Silver & Gold found!

My wife called me around 3:30 and told me that she would be running late and would be home later than usual. I thought to myself, “yes! That will give me a couple of hours to go metal detecting!”. I’ve been itching to head back to the 1906 farm house site. During my last visit I pulled out a couple more pennies from the 1940s and 1950s, so I knew there could be more! It’s getting tougher to find the good stuff, but you can’t give up on a productive site until it’s completely worked out!

Arriving at the farm, I knocked on the door and I was greeted by a nurse. She said the owner was sleeping and asked me who I was. I told her the owner normally gives me permission to go metal detecting in her yard. She said, “just a minute, let me check with her”. The owner was confined to her bed, she had recently taken a fall. I asked if I could speak briefly with her and took off my shoes and went inside to go talk to her. The owner is always very sweet and immediately wished me luck and I was off running!

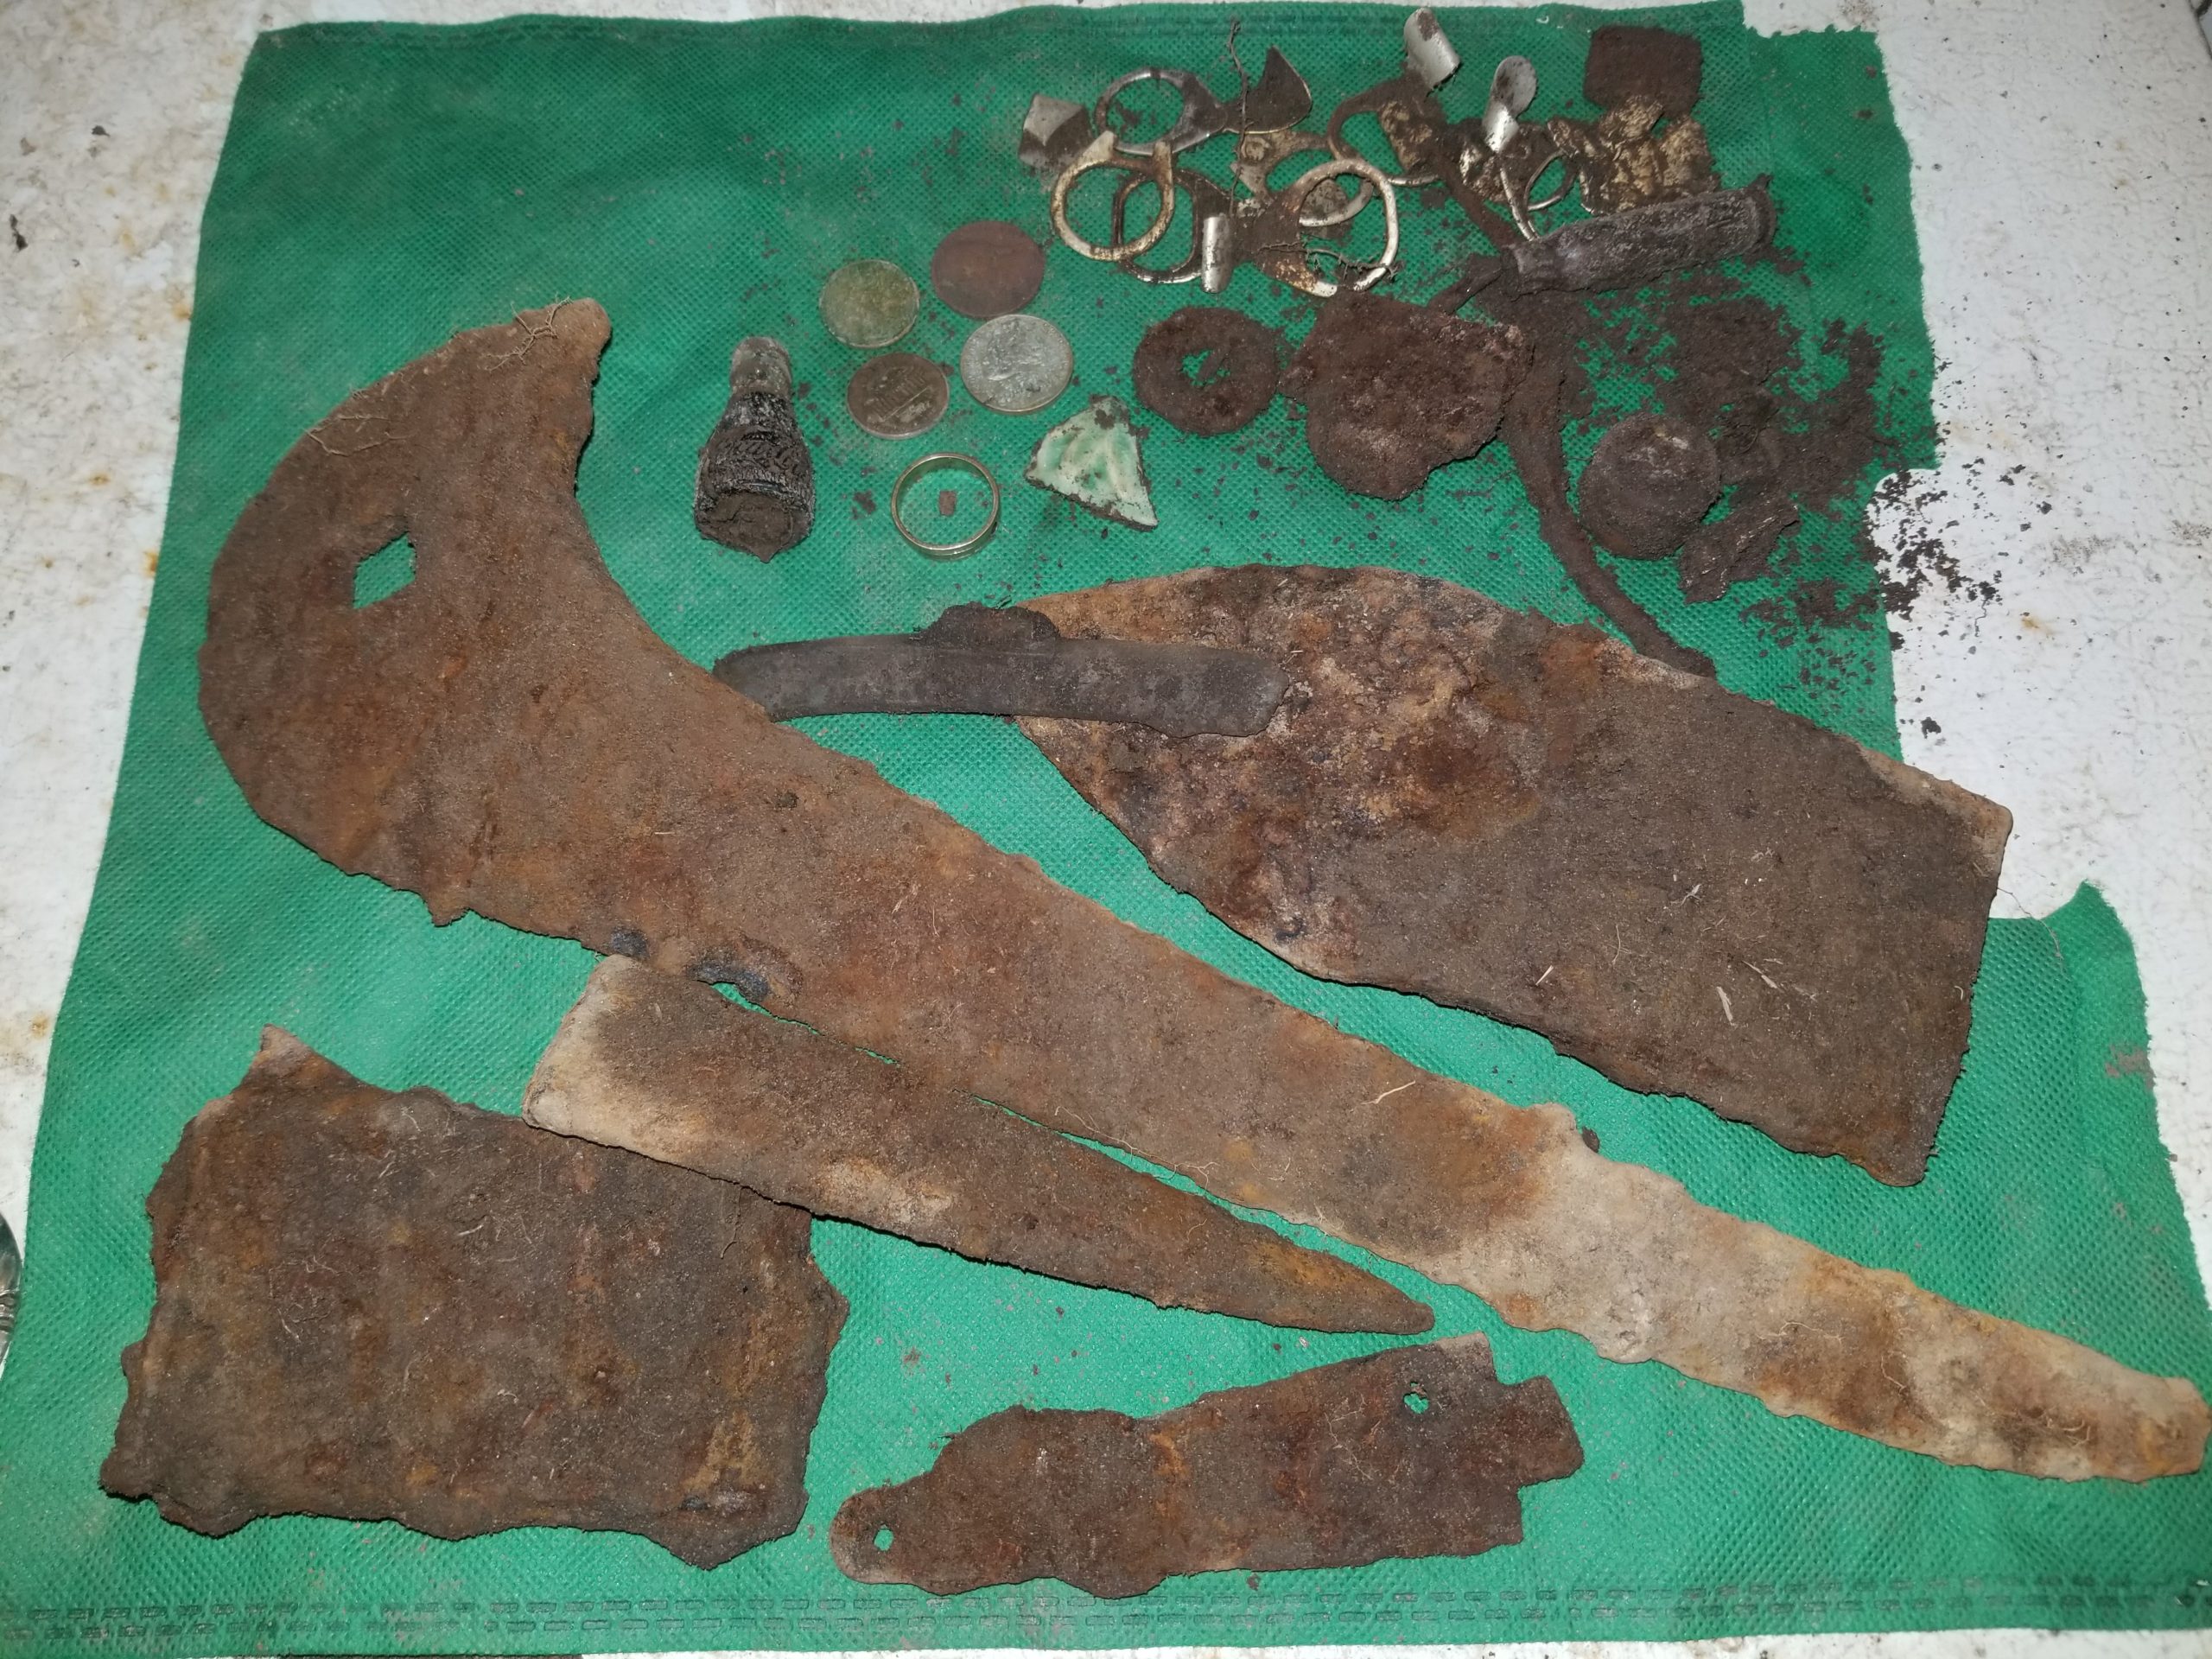
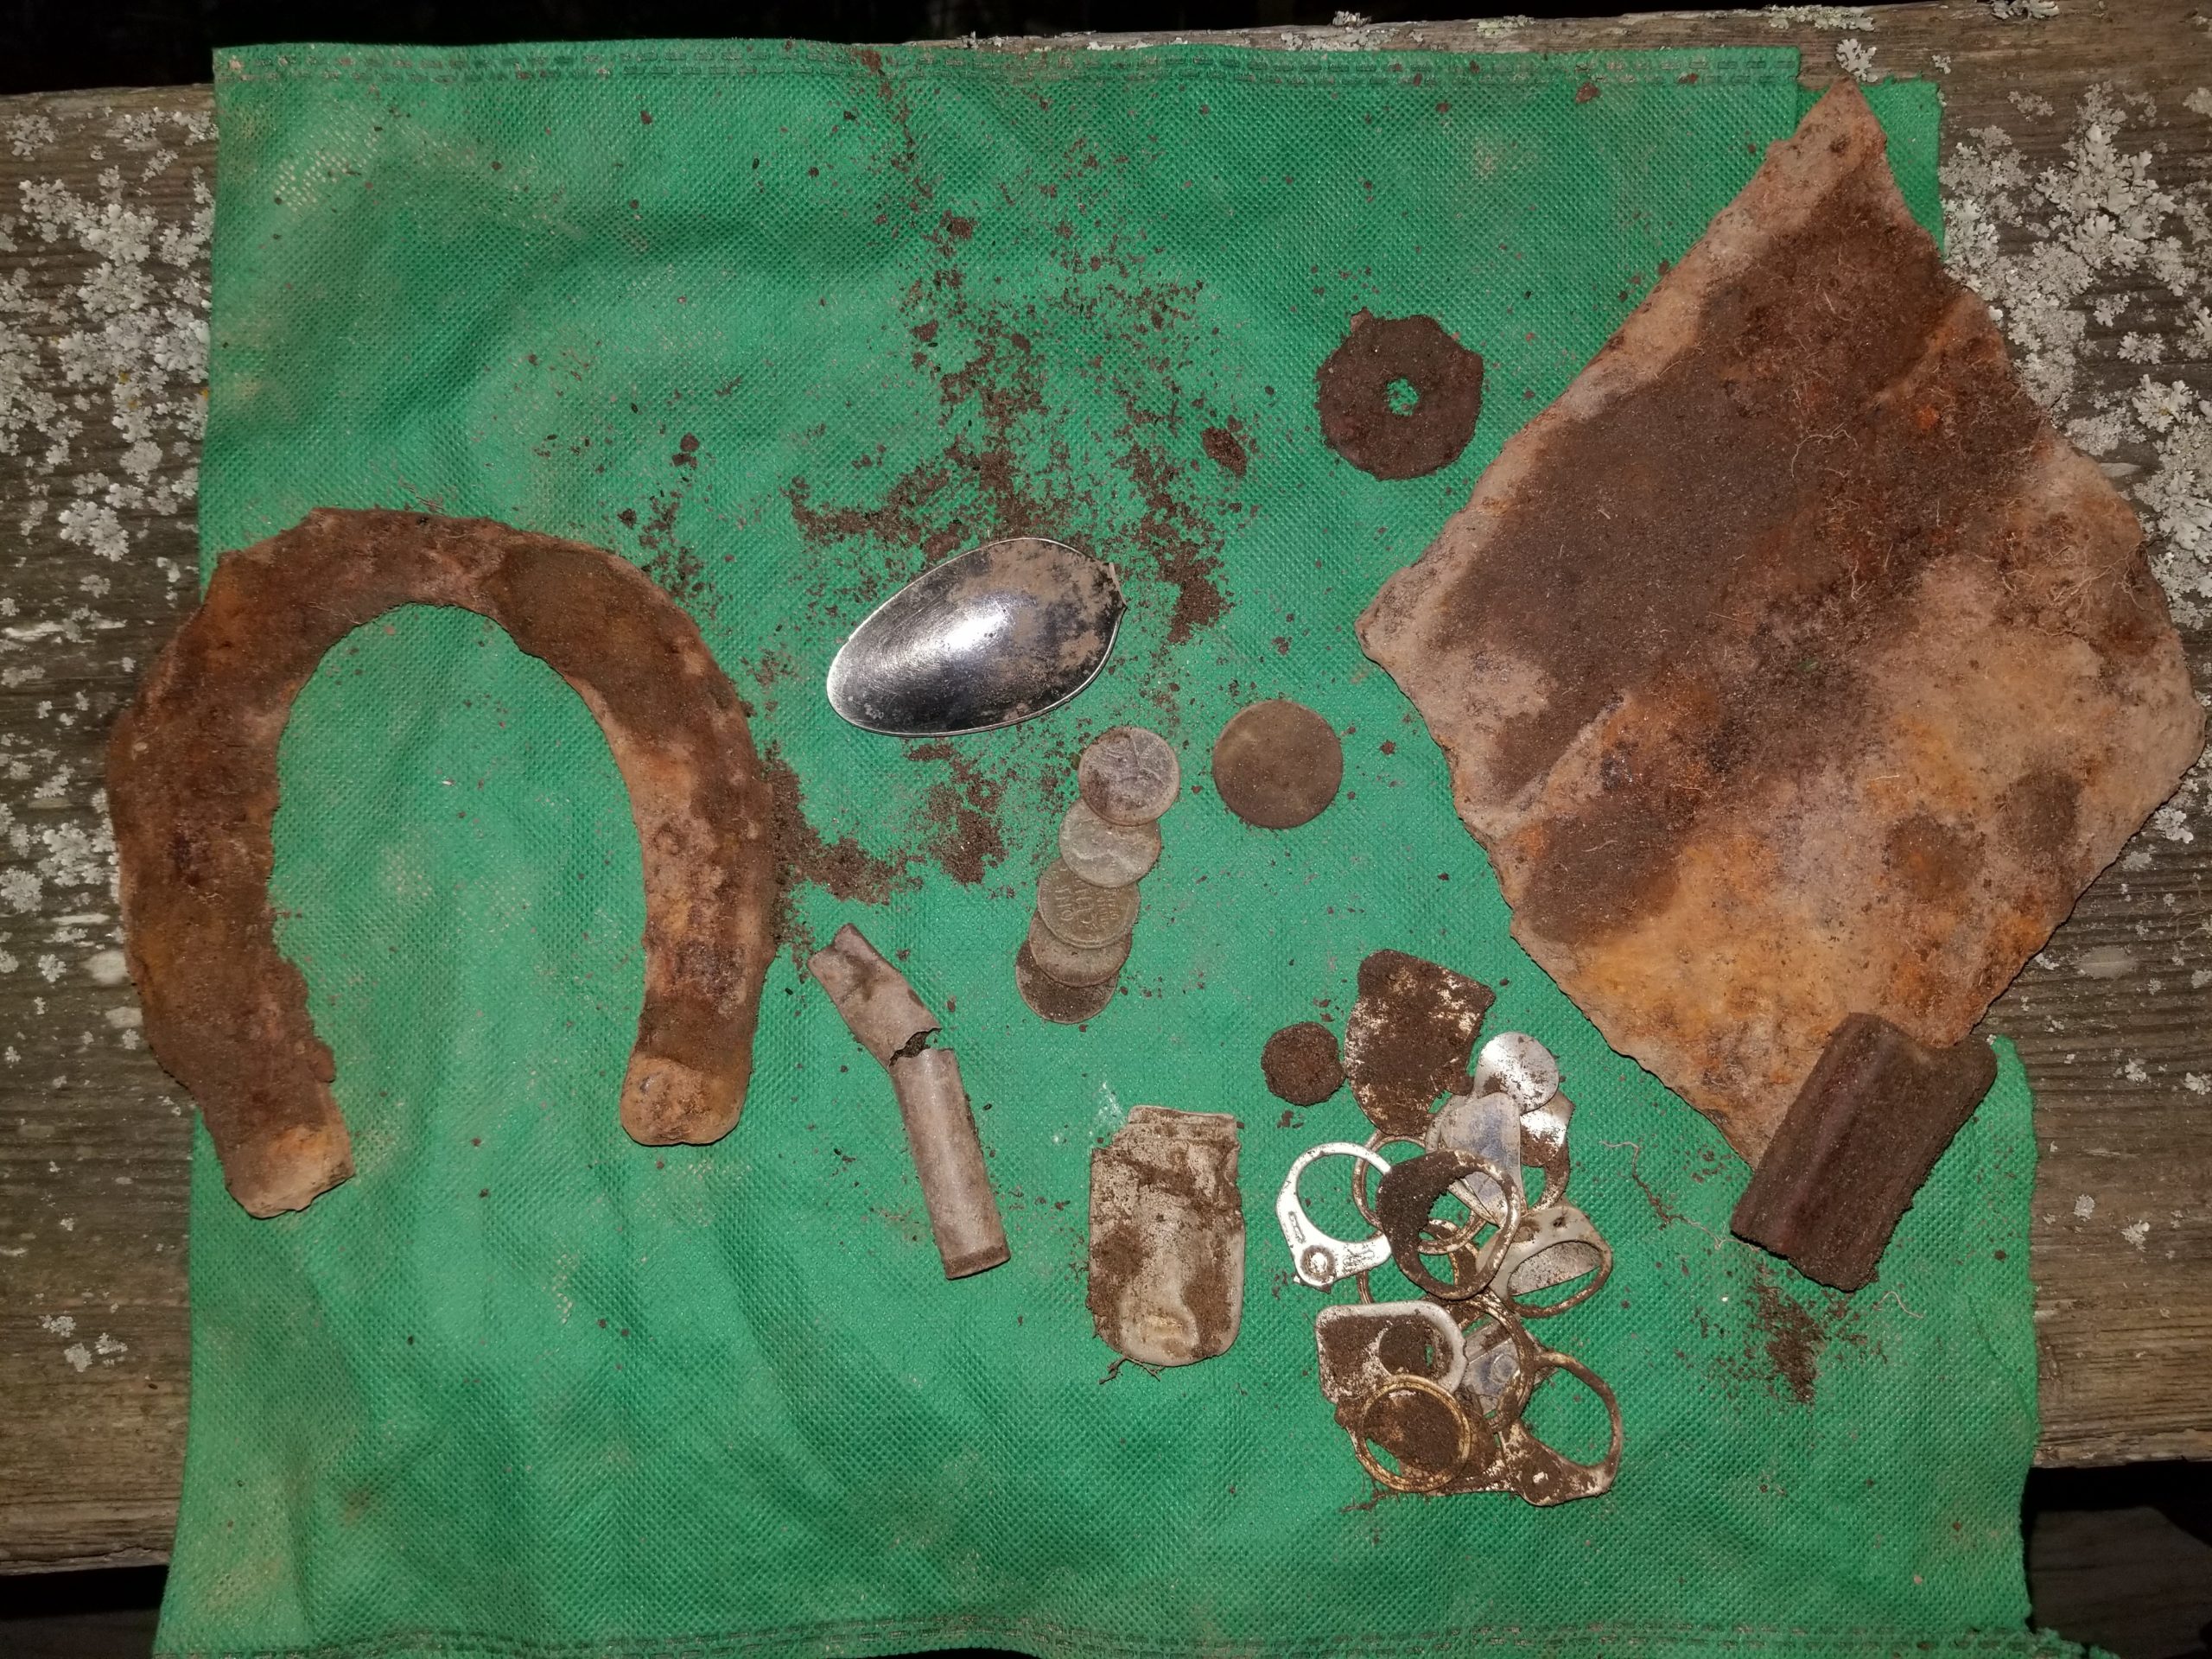
My first good find of the day was a “war” nickel. I was working in all-metal mode and the target rang up as a nickel, but when I saw it, it just looked strange! I immediately, thought, silver “war” nickel and checked the date — 1945.

I was digging every single target that didn’t fall in the “iron” range, so that included a few larger iron relics and even a couple of nails fooled my detectors discrimination. I continued to work the field and out popped a 1942 “wheatie”. Not a spectacular find, but with the silver “war” nickel and the wheat penny, I was encouraged there might be additional good finds waiting to happen.

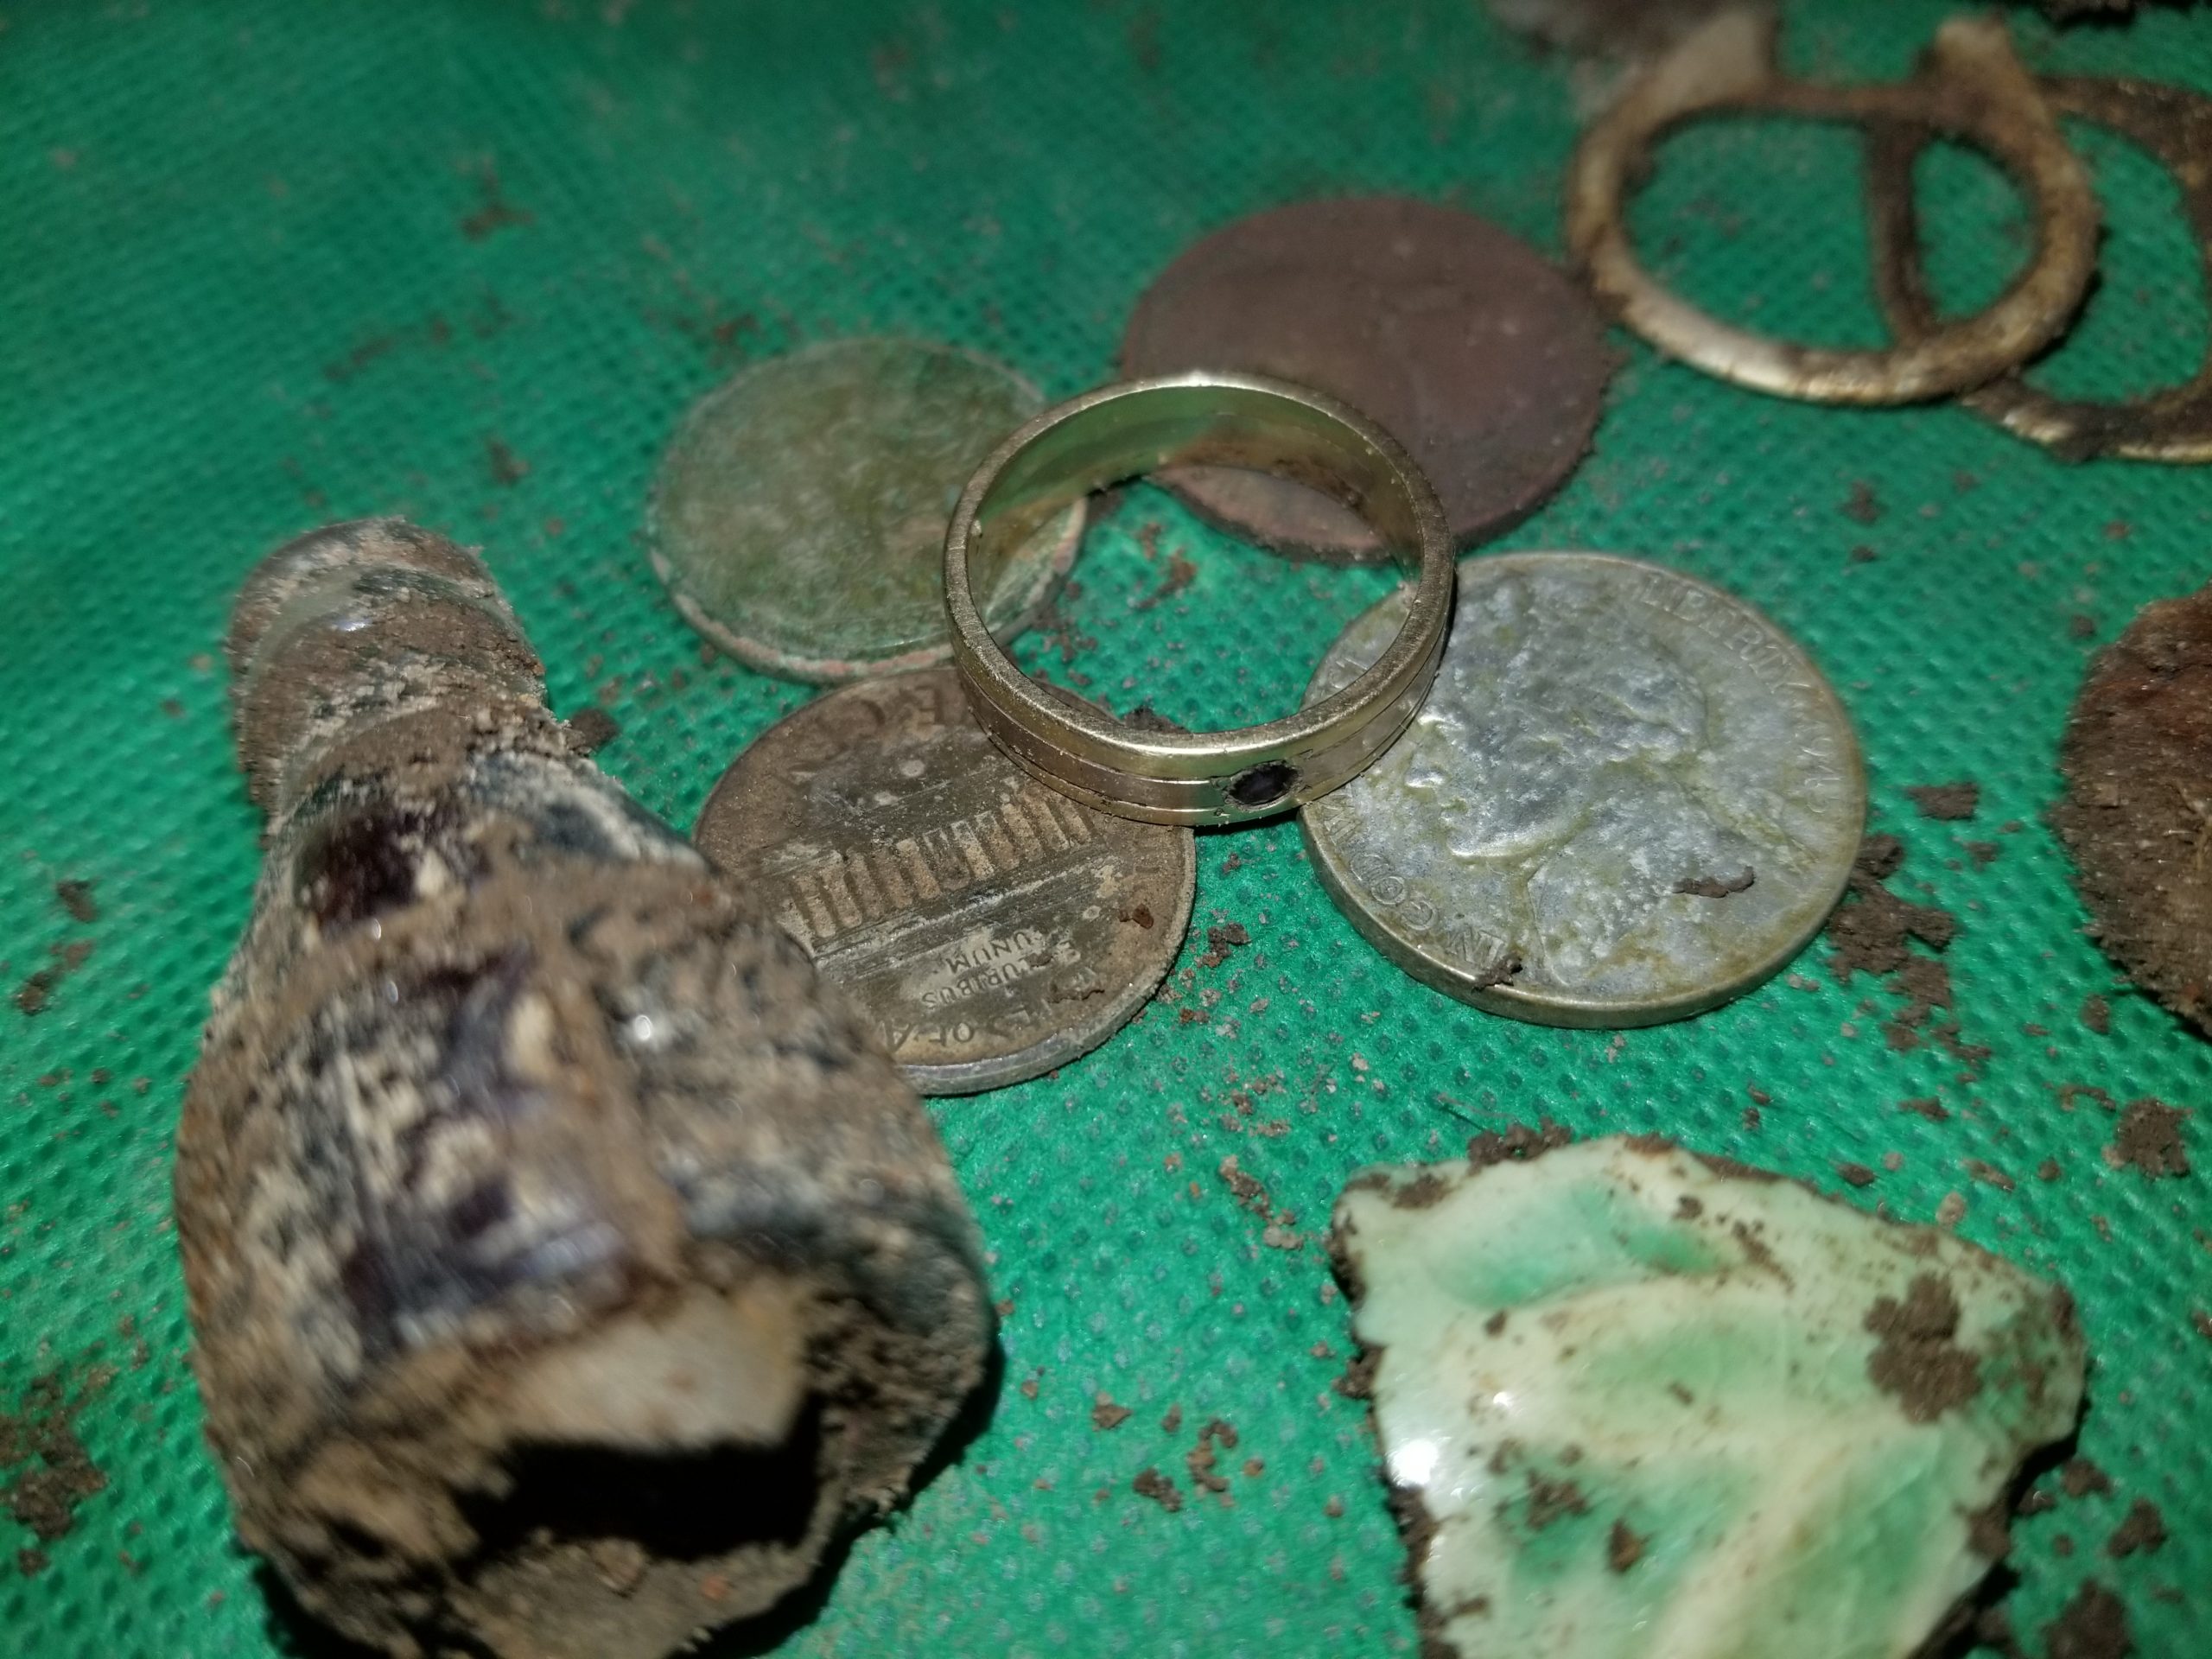
I worked the yard from around 4:00pm until dusk which since it’s winter was 5:45. I got another pull-tab signal about 3 feet from the large tree in the front yard and I thought to myself, “another pulltab :(“. I cut the plug and in the bottom of the plug I saw gold! It was a beautiful two tone gold band. My wife thinks it might be a wedding band, but I’m not sure. It’s around a size 5.5 or 6 and fits my pinkie perfectly. It’s a beautiful ring, but unfortunately it’s not marked. I’ll have to take it to a jewelry store or pawn shop to have it tested, but it sure looked shiny and new in the Georgia dirt!

I don’t want to sound like a broken record, but I think the saying still goes, “Dig everything and a site is never worked out!!!”. It’s not often you find both silver and gold when you go metal detecting, but when you do, it sure feels great! Good luck and I hope to see you all in the field getting your own silver and gold!

Metal detecting finds using a Garrett GTI 2500 in all-metal mode — large iron spanner wrench, part of plow blade, 1942 “wheatie”, 1945 silver war nickel and a two-tone gold ring!
Gold ring, 1945 silver “war” nickel, 1942 penny and assorted relics found metal detecting using a Garrett GTI 2500

How to repair a Garrett GTI 2500 battery holder

Anyone who reads our blog knows I love my Garret GTI 2500 metal detector! It’s super sensitive and it finds the gold! However, if there is anything that could be improved, it would be the battery holder. About two seasons ago I took my GTI 2500 to Daytona beach, when I got back I noticed I was having more trouble with my battery pack. Sometimes the detector wouldn’t turn on and I’d have to take the batteries out and put them back in and repeat until the detector was working again. I decided to investigate the issue. The first step was to open up the battery holder, remove it from the detector and flip it over on your work bench. The battery holder is held together by 5 phillips head #2 screws.

Garrett GTI 2500 metal detector battery holder — remove 5 screws to open up battery pack

When I opened up the battery holder it became immediately apparent why I was having so much trouble…two of the four battery terminals were severely corroded!

The Garrett GTI 2500 battery holder has four battery contacts that are soldered into the plug that goes between the battery back and the detector.

Garret GTI 2500 battery holder with severely corroded battery contacts (probably oxidation from trip to salt water beach)

After researching, I found the following battery contacts available from Newark.com:

KEYSTONE  209  Battery Contact, AA, A, Snap Contact, Steel, Nickel Plated

I also ordered some new AA battery holders from Newark. Total cost was $18 dollars with shipping and taxes.

QTY-2 — KEYSTONE  209  Battery Contact, AA, A, Snap Contact, Steel, Nickel Plated

QTY-2 — PRO POWER  28-12570  Battery Holder, Snap Fit, AA X 4

To finish the repair I cut off the corroded contacts using a pair of wire cutters. Since the wiring fits snugly in the battery holder, I added a small piece of copper wiring to extend the wiring I cut. I then soldered in the KEYSTONE 209 battery contact and used heat shrink tubing where necessary to complete the repair.

Pay attention to the orientation of the battery contact. I actually soldered in one of them backwards and had to remove it and turn it around and solder it in again (the contact only snaps in with a certain orientation)
Completed repair of GTI 2500 battery holder — I only replaced the outer two battery contacts (the other two didn’t seem corroded bad enough to warrant replacement)

I hope you enjoyed with tutorial. As I said, I love my Garrett GTI 2500, but the battery holder is the metal detector’s weak point. Fortunately, if you’re handy with electronics and soldering, it’s a pretty easy fix. If not, please don’t hesitate to reach out to Garrett directly. They have a world class support team and could either repair your existing battery holder or sell you a complete new one. I can’t wait to see what hybrid metal detector’s they come up with the purchase of White’s electronics. What a great combination, Garrett quality and Whites innovation!

Tale of 3 wheaties — metal detecting tips

I’m no expert on metal detecting, but I’ve enjoyed the hobby for many years. I normally write about my adventures, but this article is going to be a little different. I’d like to spread a little knowledge…like I said I’m no expert, but I’ve noticed I find more when I follow these three rules:

  1. Slow down
  2. If your metal detector has an all-metal mode, use it.
  3. Dig everything and a site is never hunted out!

Tip #1 is the single most important metal detecting tip I can pass over to you. In fact, this is probably the single biggest mistake most metal detectorists (even the pros) make all the time. I know I make this mistake all the time! I even notice my self doing it and I continue to do it! It’s very, very frustrating! It’s just human nature to try and find out what’s in another area or to start going faster when we should start going slower! For instance, I had about an hour and half to work the 1906 farm. Mike, my dad and I have been to this site many, many times, but it’s a large farm, so there is no way it’s hunted out. I decided to try the above tips and see if I could pull any more old coins from this farm. Here are the my results:

Metal detecting finds — 1.5 hrs of metal detecting hunted-out 1906 farm house

As you can see, I didn’t find anything to write home about, but I managed to pull three more old coins from this yard! I did this by practicing my above three points. I slowed down, way down! In fact, I was just taking very small baby steps and overlapping my coil and swinging multiple times over each area. I was also working in all-metal mode which on the Garrett GTI 2500 is super sensitive! I did just one single strip in the front yard that has yielded many old coins including silver dimes and quarters in past hunts. I really didn’t think I would find this much! Just look at how many pull tabs I pulled out, every single one of them could have been a gold ring or gold jewelry! I even found three more old coins, they just happened to be wheat pennies, but my dad, my brother and I had missed them and if we missed these coins, we missed other old coins too! Like I said, I only did one small strip in the front yard. I also noticed as my time was running out, so did my patience! The last 15 minutes or so, I was rushing and my finds stopped dead!

I know it’s easy to “cherry pick” with modern detectors. They’re extremely reliable when it comes to target ID and it’s easy to just dig the “high” tones, but this is a mistake! Gold coins and gold jewelry are very easy to miss and will read anywhere from foil to zinc penny on the conductivity range and that’s a huge conductivity range! So tip #3 is almost as important as tip #1, but I think if you only get one thing from this article it should be slow down, slow down, slow down.

Thanks for reading and I hope to see you all out there getting the gold! Good luck!!!