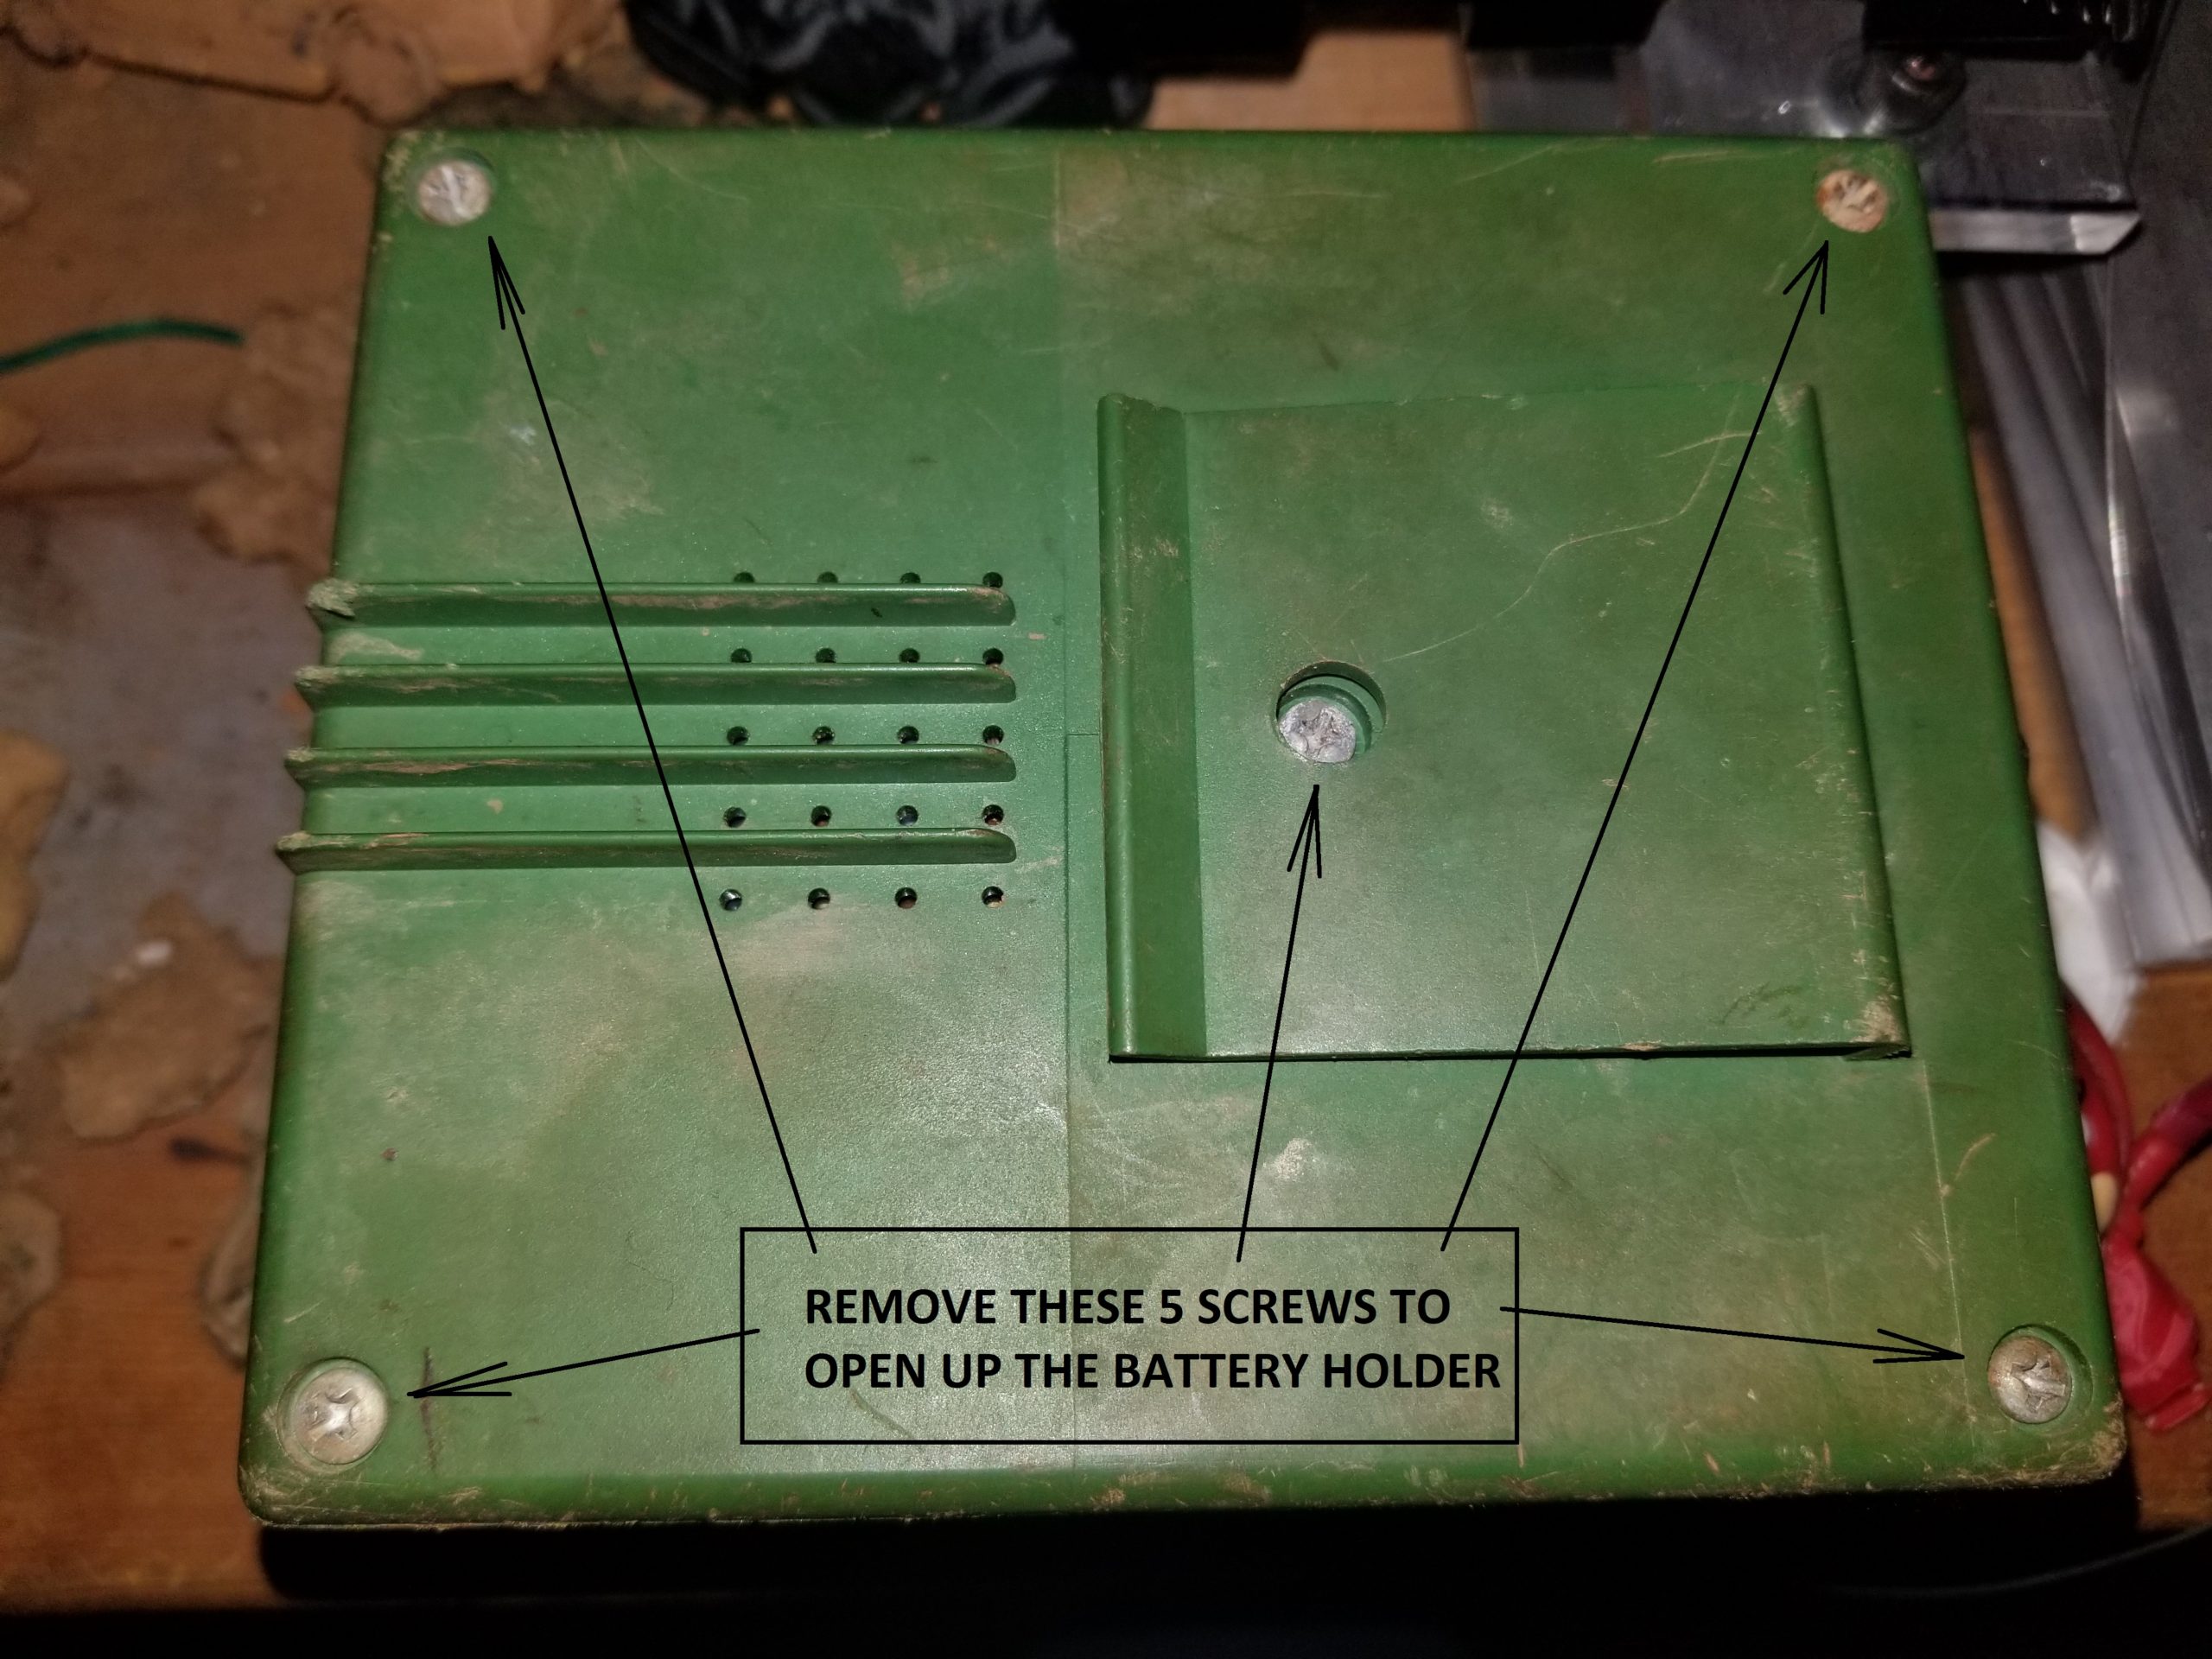
Anyone who reads our blog knows I love my Garret GTI 2500 metal detector! It’s super sensitive and it finds the gold! However, if there is anything that could be improved, it would be the battery holder. About two seasons ago I took my GTI 2500 to Daytona beach, when I got back I noticed I was having more trouble with my battery pack. Sometimes the detector wouldn’t turn on and I’d have to take the batteries out and put them back in and repeat until the detector was working again. I decided to investigate the issue. The first step was to open up the battery holder, remove it from the detector and flip it over on your work bench. The battery holder is held together by 5 phillips head #2 screws.
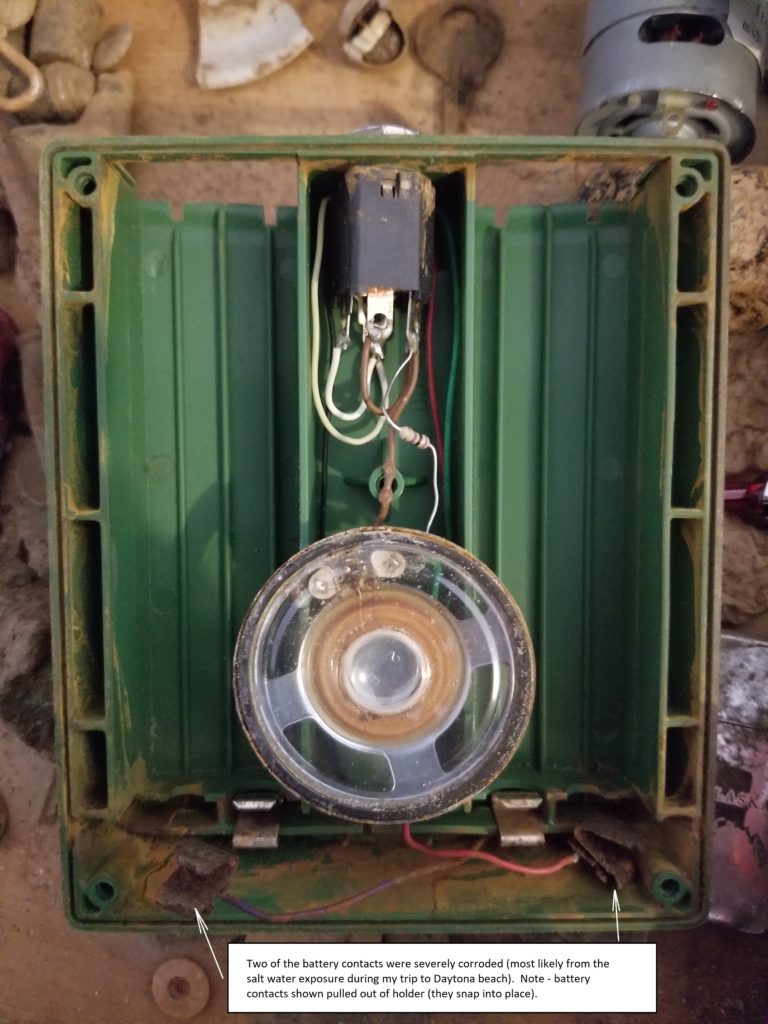
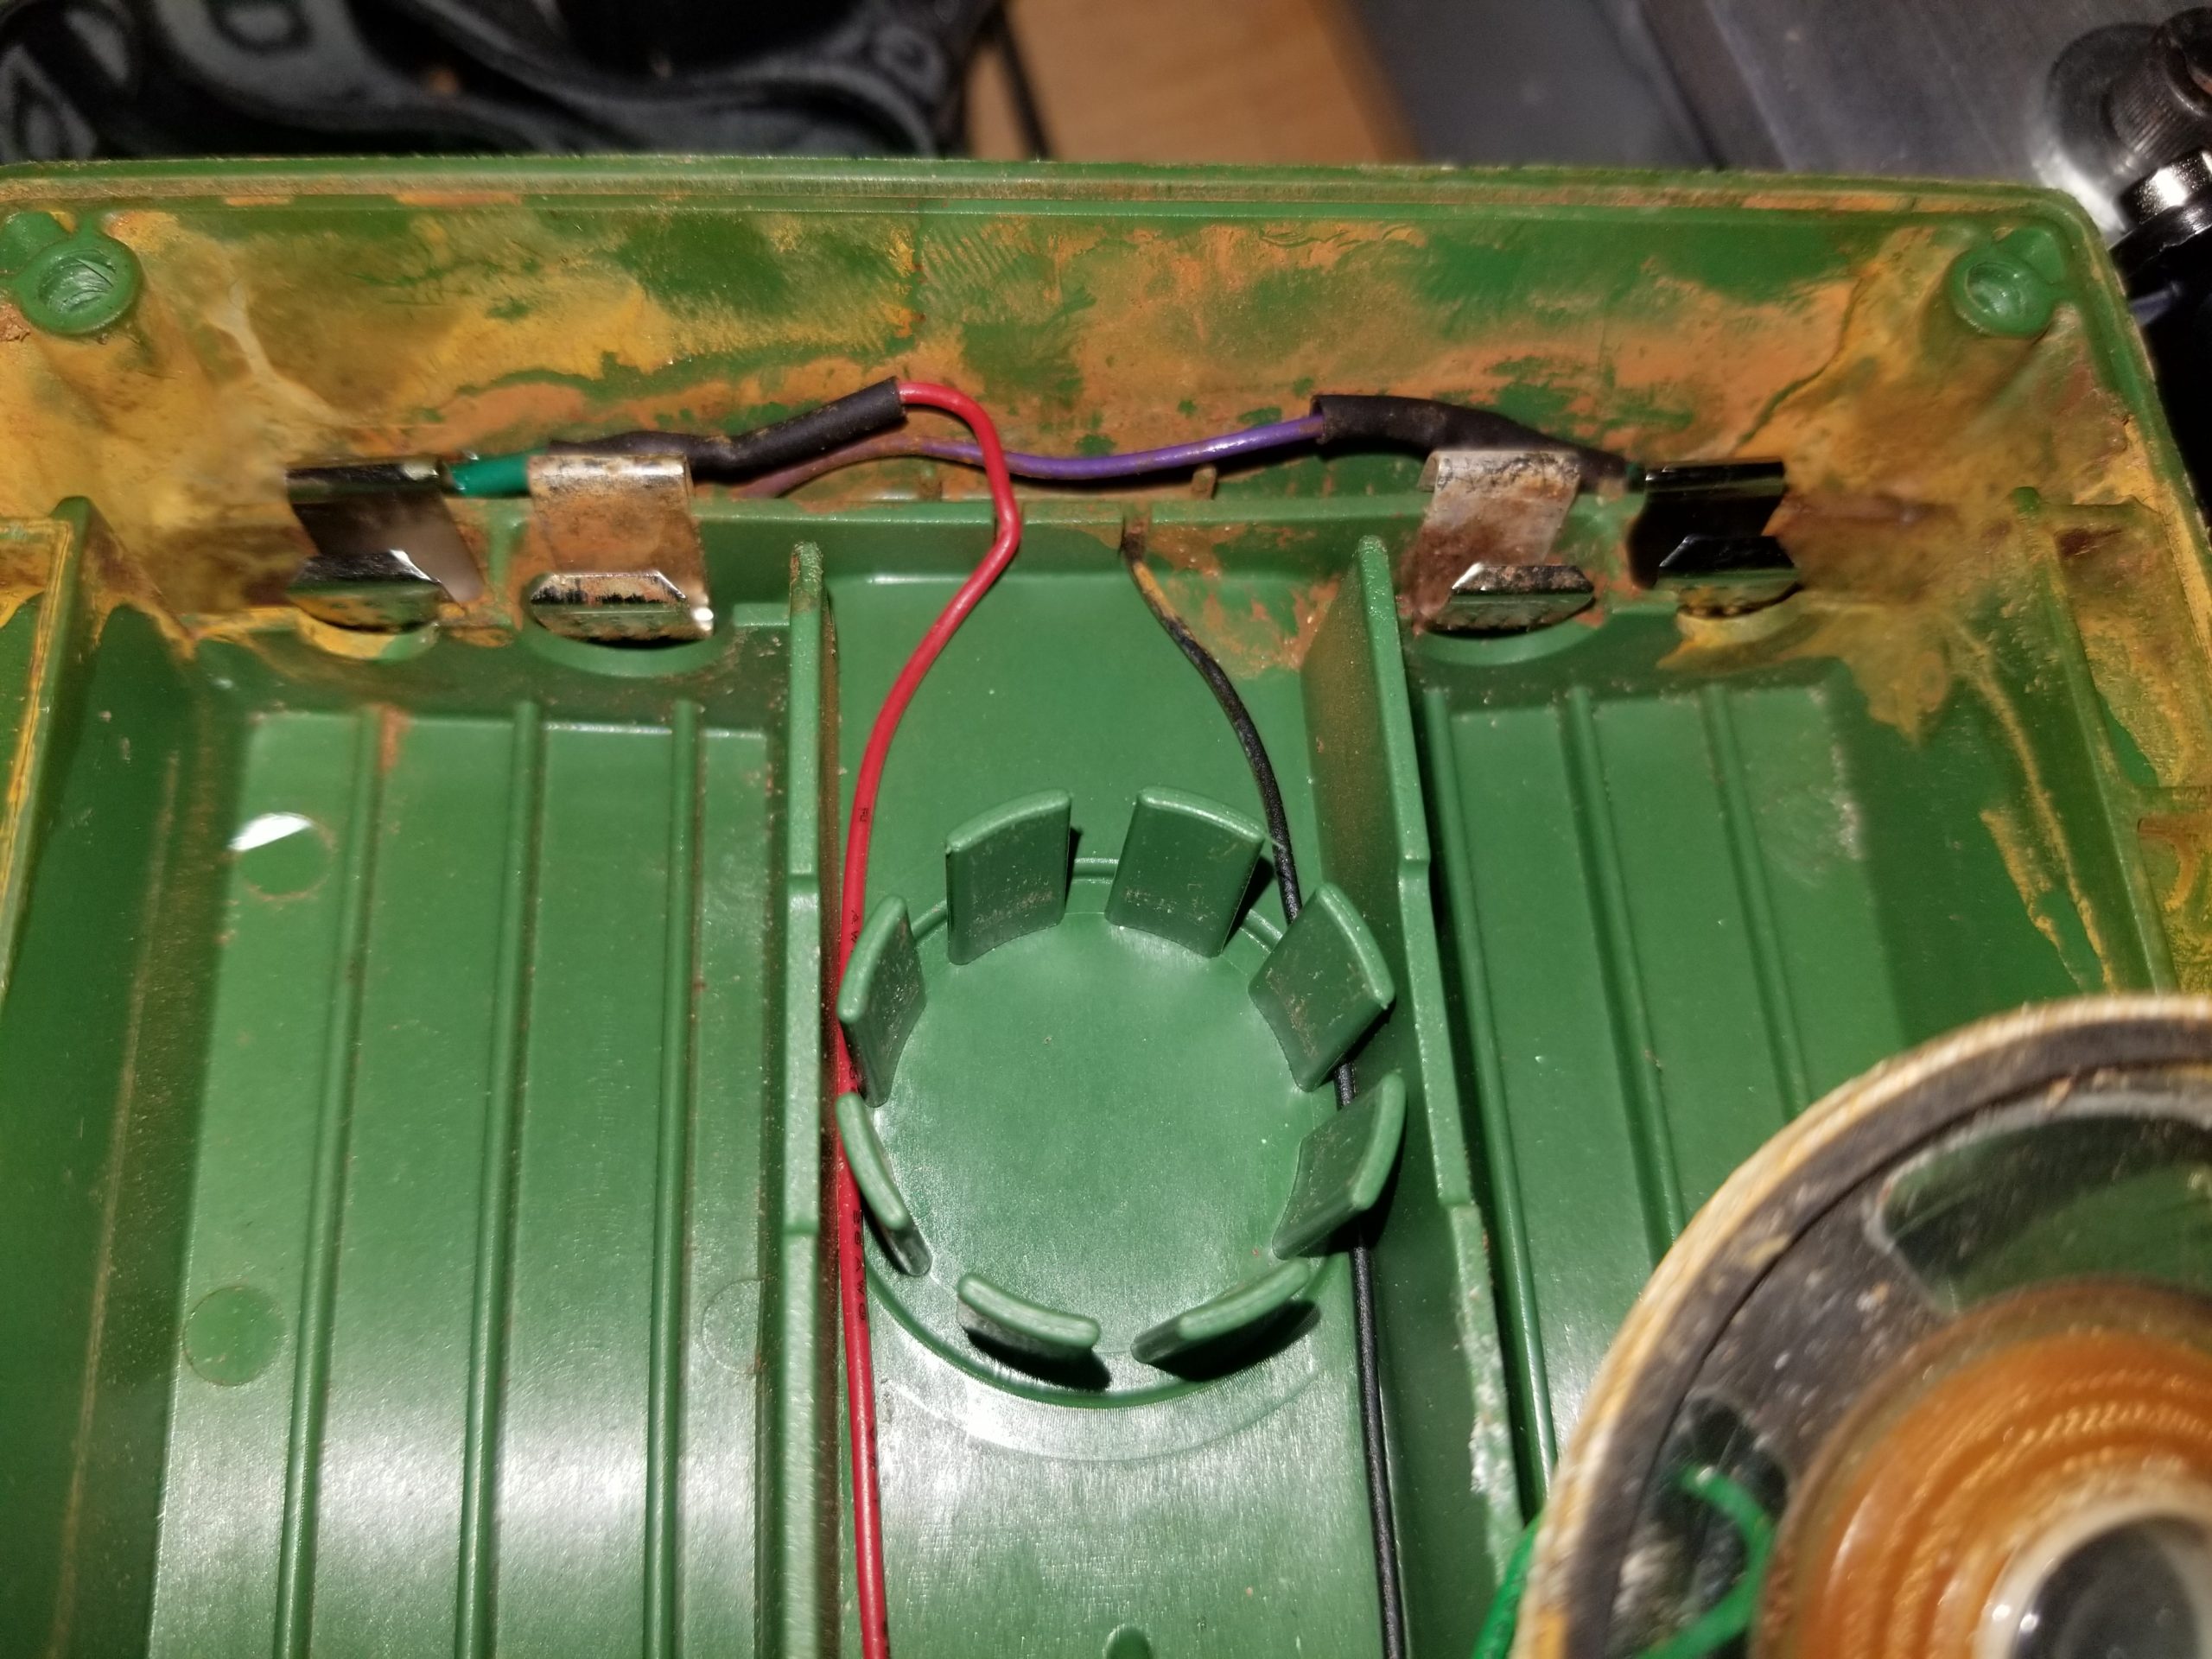
When I opened up the battery holder it became immediately apparent why I was having so much trouble…two of the four battery terminals were severely corroded!
The Garrett GTI 2500 battery holder has four battery contacts that are soldered into the plug that goes between the battery back and the detector.
After researching, I found the following battery contacts available from Newark.com:
I also ordered some new AA battery holders from Newark. Total cost was $18 dollars with shipping and taxes.
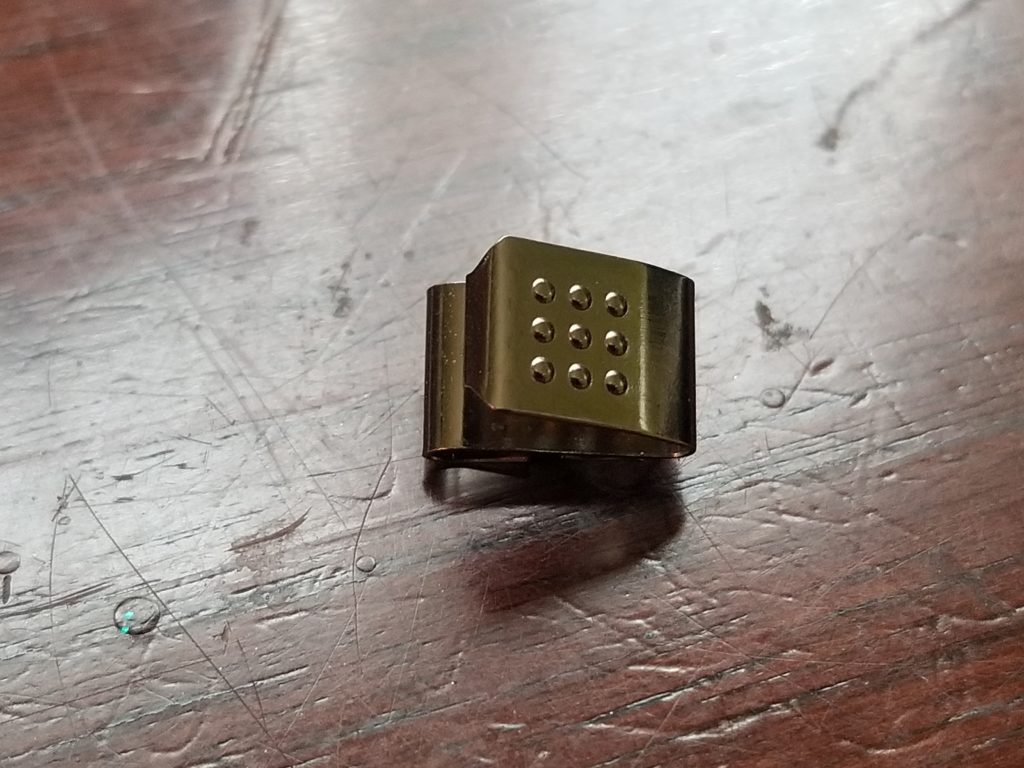
QTY-2 — KEYSTONE 209 Battery Contact, AA, A, Snap Contact, Steel, Nickel Plated
QTY-2 — PRO POWER 28-12570 Battery Holder, Snap Fit, AA X 4
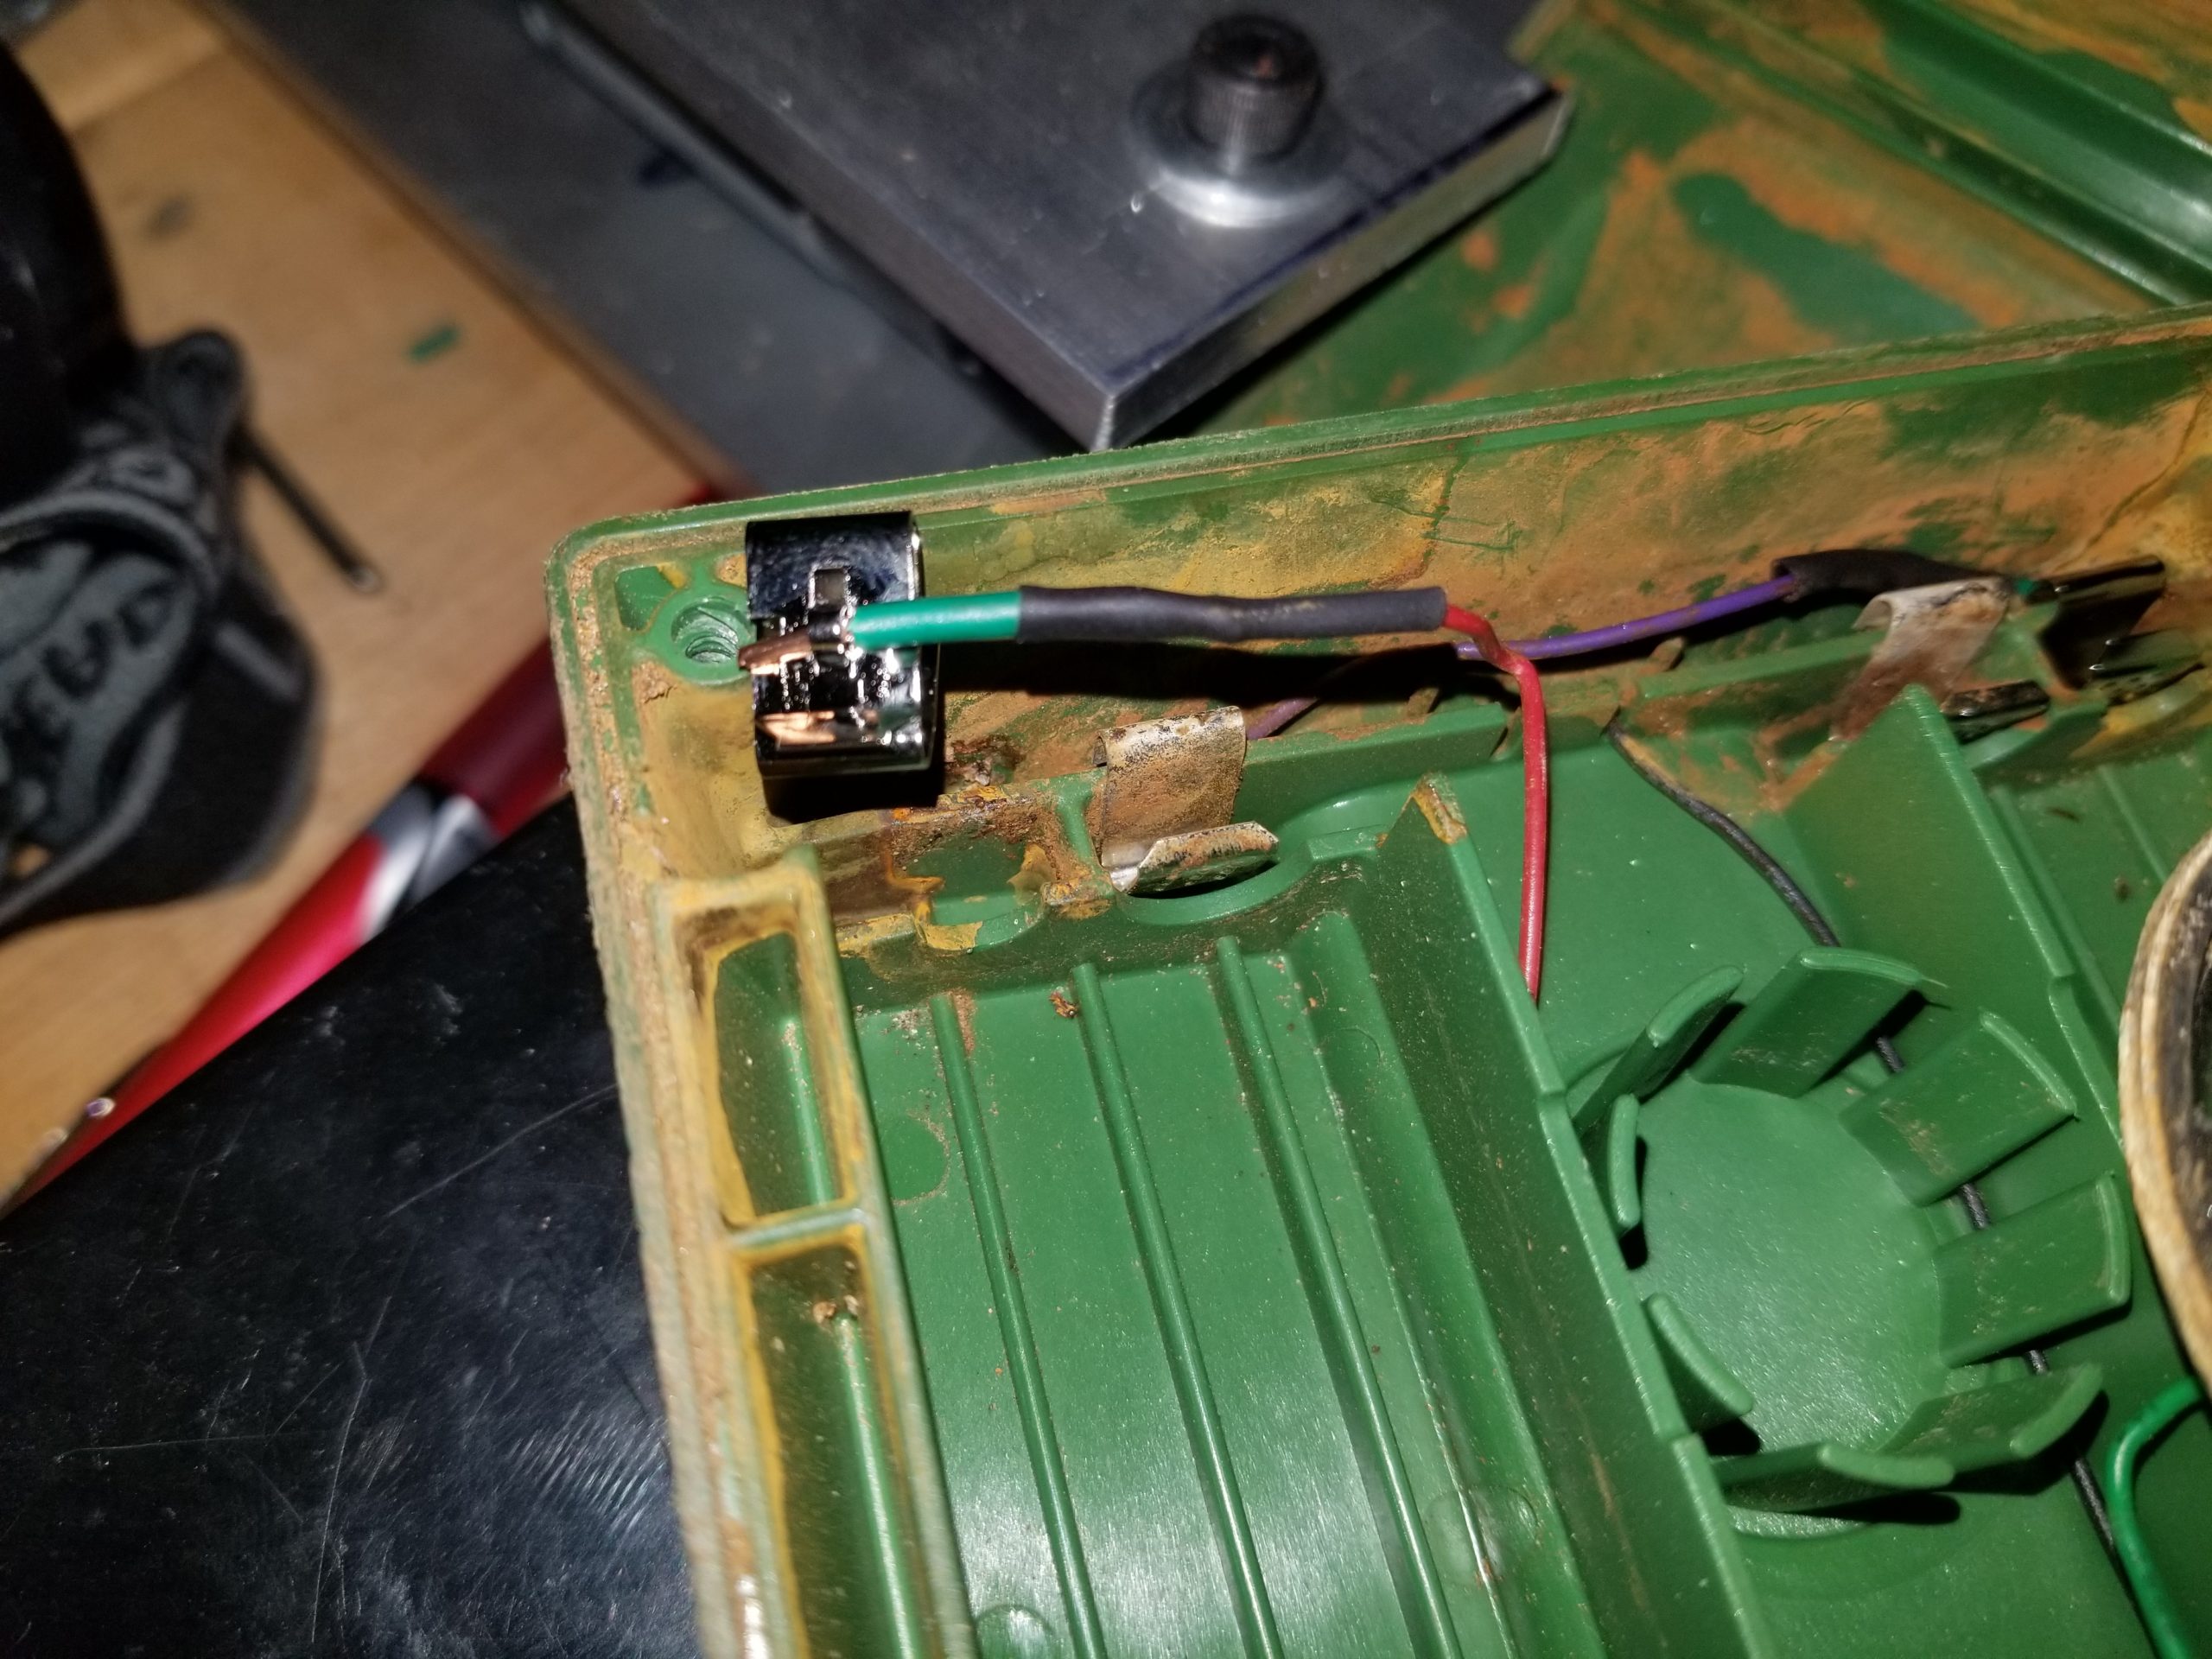
To finish the repair I cut off the corroded contacts using a pair of wire cutters. Since the wiring fits snugly in the battery holder, I added a small piece of copper wiring to extend the wiring I cut. I then soldered in the KEYSTONE 209 battery contact and used heat shrink tubing where necessary to complete the repair.
I hope you enjoyed with tutorial. As I said, I love my Garrett GTI 2500, but the battery holder is the metal detector’s weak point. Fortunately, if you’re handy with electronics and soldering, it’s a pretty easy fix. If not, please don’t hesitate to reach out to Garrett directly. They have a world class support team and could either repair your existing battery holder or sell you a complete new one. I can’t wait to see what hybrid metal detector’s they come up with the purchase of White’s electronics. What a great combination, Garrett quality and Whites innovation!